-
Accuracy
-
Fire Rate
-
Range
-
Handling
-
Mobility
-
Battle Effectiveness
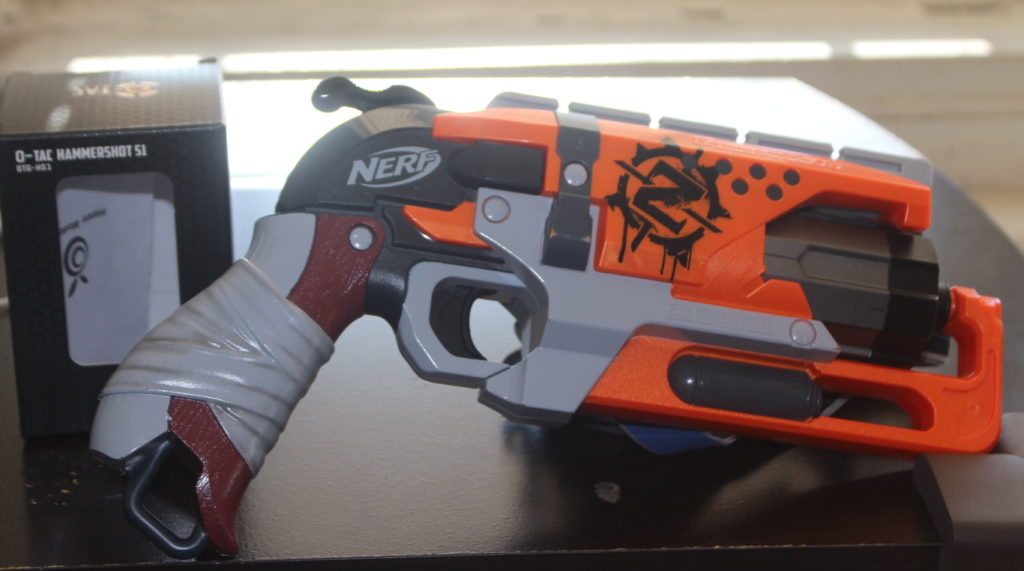
You see a Nerf Hammershot(or two) in my holster, and you start thinking about whether that’s a regular Hammershot or not. Uh-huh, I know what you’re thinking… “Does he have a 6 shot cylinder, or only a 5?” Well to tell you the truth, in all this excitement, I kind of lost track myself. But being this is a Nerf Hammershot, the most awesome sidearm in the Nerf Nation and would blow your Rival mask clean off your face, you’ve gotta ask yourself one question: “Do I feel lucky?” Well, do ya, punk?
Meet the O-TAC GEAR HAMMERSHOT S1 KIT from Orange Mod Works.
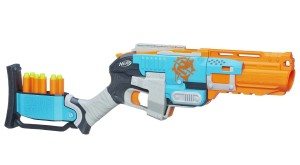
The biggest argument for the Strongarm in the Hammershot vs Strongarm debate was always the”it’s got 1 extra shot!” line. Well, with this new Nerf Hammershot Mod Kit, we’re about to even the playing field… The Orange Mod Works O-Tac Gear Hammershot S1 Mod Kit brings the Nerf Hammershot up to true six-shooter status and matches the Strongarm in ammo capacity. Besides the new six shot cylinder, it also includes a replacement trigger, hammer, and a beefy spring to bump up your power level, too. So, let’s jump right in and take a look at this epic Nerf Hammershot Mod Kit.
Unboxing the Nerf Hammershot Mod Kit…
Inside the box, you’ll find that this is one full featured kit. It comes with a new spring, a new trigger, a new hammer, a new cylinder and a cylinder axle. The spring is an upgraded 8 kilogram spring that more than doubles the power output of the original Hammershot spring. The new trigger is black, and coated in a non-abrasive rubber paint. The new hammer is also black and features a super tactile grip. The replacement cylinder? It features an ultra cool grey and black metallic paint and looks very cool and super official. Oh, and it also has 6 dart chambers instead of the usual 5. That means your ammo capacity just caught up with the Nerf Strongarm blaster. Sweet. The kit also includes a couple of beefed up catch springs, (To see a full breakdown of what’s included in the box, you can check out my Nerf Hammershot Mod Kit video on YouTube, just click here.)
Nerf Hammershot Mod Kit Installation.:
So now that we’ve unboxed the Nerf Hammershot mod kit, it’s time to unbox the Nerf Hammershot itself, so to speak. This Nerf Hammershot mod kit requires that we take the blaster apart and remove several key functioning pieces. So, we must remove all the screws and separate the blaster shell into two halves. There are 12 screws in total and you must unscrew them completely, though you can leave the screws themselves inside of the shell to make sure you don’t lose any of the screws. Once you’re finished unscrewing the Hammershot, lift the top half of the shell off and put it to the side. Now, you can see all of the internals of the Hammershot. This is what it should look like:

You should see something similar to the picture up above. You’ll see your plunger, hammer, trigger, and your main firing spring, as well as the stock orange cylinder. You can take every single thing out of this part of the shell to make things more easy. Literally, everything. First, take the cylinder out and set it aside. The rest of the internals literally come out in one whole piece. The Nerf Hammershot internals are so well contained that you can hold it in your hand without anything falling out. You can even cock it back and fire it with no problems.

Next, put it down back onto your table and prepare to take everything completely apart. Go on, put it down. Remove the three screws in the white panel covering the trigger and hammer assembly. This piece is the thing that’s pretty much holding everything together. Remove the screws completely and set them to the side. Taking the screws totally out of this piece will help when you need to put everything back together. This is what things should look like now..:
In this picture I’ve removed everything that we need to take out. I also have the accompanying replacement pieces from the Nerf Hammershot mod kit. You’ll see the orange trigger, by the new black one. You’ll also see the old and new springs. And in between the triggers and the springs, you’ll see the Hammer assembly. The Nerf Hammershot hammer is connected by two pins, one on either side, to two different rods. One is the plunger rod and on the other end is the spring load rod, which is where you slide the spring onto…

First things first, grab the hammer assembly. You need to hammer out those two pins. Line up a small phillips head screwdriver and hammer out the pins completely. Make sure you do this on a padded surface or else you risk damaging your table or maybe even the actual Hammershot internals. So hammer the pins out and set them to the side. At this point, your actual hammer should be free and you can set that piece aside as it is no longer needed. Now grab the black replacement hammer piece and line it up with the priming rod and the spring rod. Push the pins halfway into the pin holes and hammer the pins back in, all the way. There is a rough side to the pins that is more tactile and is meant to hold things in place. Make sure you hammer the smooth end in first.
This is what it should look like when you have everything back together. Next, we’ll venture into performing some basic Nerf Hammershot mods while we have it open. This is purely optional and you can skip by this part if you don’t want to perform these mods. Remove the O-Ring, which is that black rubber ring around the plunger head. Remove the ring and then wipe off all of the excess grease. You’ll need to cut off a length of tape. Teflon tape is preferred, but electrical tape will work as well. Wrap it around the plunger head, underneath where the o-ring was. You can wrap about two lengths of tape around the plunger head.
Here you can see that I’ve used a bright purple tape to wrap the plunger head. This increases the air seal and thus the power efficiency of the blaster. After the tape is secure, you can put the o-ring back onto the plunger head, but make sure you don’t stretch the o-ring out too much, or it will cripple the blaster.
This pic was taken right after I reinstalled the Hammer into the internals assembly and reinserted the plunger head into the plunger. Pay attention to which holes the plunger rod and spring rod are hammered into and also which hole the hammer assembly uses to rest on the large metal pin at the bottom. I also added the new trigger, which was pretty simple. Just insert the trigger onto the big metal pin and then insert the little spring rod through the smaller hole just above the pin hole. Now all I need to do is add the new spring.
In this picture, I have screwed the protector plate back over the hammer and trigger. I also added the new beefed up spring and I have put the whole assembly back into one side of the blaster shell. Now we just have to add the new cylinder. We’re almost done!
Luckily, adding the new 6-shot cylinder is one of the easiest parts of the whole Nerf Hammershot mod kit. You literally just slide it in. But first, make sure you have a necessary piece that is easily overlooked and might have been removed with the stock cylinder. It looks like this:
You need to secure this piece and return it to its original position, which is in a little slot right beneath the plunger tube. This piece is what the cylinder slides onto. Repeat: You can not use your blaster without this piece!
Back to the cylinder. After adding that little orange piece, slide the cylinder right onto it and into the blaster shell. Holding it on a slight angle, push it all the way back and then down into the shell.
This is what the back of the cylinder should look like. That little ring should be behind the little lip of the blaster shell and the back of the cylinder should be pretty flush with the front of the plunger tube.

The other side of the cylinder should look like this. That little cylinder axle should fit in perfectly, with the angled ends up top. This helps with the spinning of the cylinder, so make sure you have everything here lined up and inserted correctly.
One last look before we close her up and tighten all the screws. Your blaster should look just like this when your Nerf Hammershot mod kit is fully installed.
And now, we seal her up. Another Nerf Hammershot mod kit successfully installed. Good job!
There she is, the finished product. She shoots twice as hard and has 1 extra shot. Priceless. Overall, the kit is not perfect, but I absolutely love it. Head on over to OrangeModWorks.com and check it out right now!
For a more in depth look and to hear me talking about other details of this Nerf Hammershot mod kit AND to see a quick firing test, head on over to YouTube channel! (Or just click play on the video up above to check out my video review of this kit…)
That’s all guys, thanks for reading and/or watching and until next time, Nerf on!
Buy the O-TAC GEAR HAMMERSHOT S1 KIT: http://www.orangemodworks.com/?Click=…
OMW on AMZN: http://amzn.to/1WJ9E4t
Buy the Nerf Hammershot: http://amzn.to/1PvGOEt
—————————————-
Stay tuned to my channel for more fun Nerf Gun related videos!
Subscribe to my YouTube channel (it’s free!): http://www.youtube.com/subscription_center?add_user=NerfGunAttachments
—————————————-
Facebook: https://www.facebook.com/nerfgunattachments
Twitter: https://twitter.com/bleeNGA
Instagram: https://instagram.com/nerfgunattachments







Do you sell the Hammershot with the upgrades already installed?