
Blee's DECREE
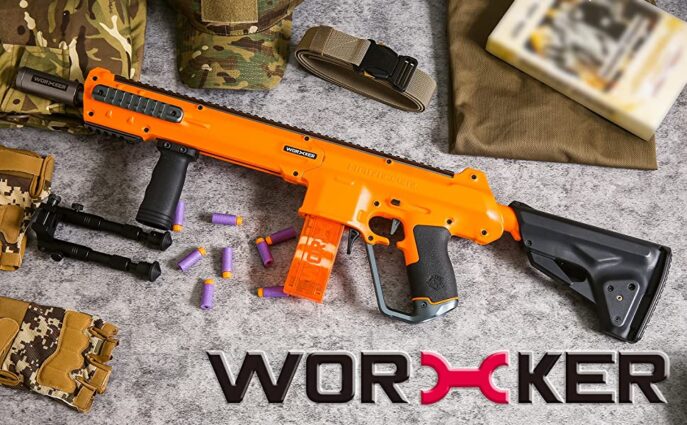
The Worker Harrier is the latest high-performance blaster from aftermarket mod company Worker. It is yet another primary class, mag fed, pump-action springer, but has Worker learned any new tricks? Or is this just the Worker Swift 2.0? Spoiler: They learned new tricks.
Pros
- Extremely durable, high quality
- Injection Molded to Perfection
- Ergonomic Masterpiece
- High Muzzle Velocity of ~200 FPS
- Reliable and Consistent
Cons
- No toolless, quick takedown pins
- Budget Shoulder Stock
- Comes with Puny 6-round mag
Table of Contents
All right, guys! This is it, this is the Worker Harrier! And what a name this blaster has! Immediately I think of the Harrier jump jet, a jet-powered attack aircraft that’s known for its short vertical takeoff and landing (VTOL) capabilities. Yes, you saw it as a killstreak in Call of Duty. Yes, you saw it in the Arnold Schwarzenegger action movie True Lies. And now you can see it in… your own hands!
Full Disclaimer though, the Worker Harrier is no doubt named after the bird of the same name and unfortunately not after the VTOL jet. It’s okay though, the Harrier is a species of Hawk and that means it’s a bird of prey and that’s still super cool. We like those! Anyway, back to
The Worker Harrier
This is not your regular old Nerf blaster. The Worker Harrier is a high performance, competition ready dart blaster made by aftermarket mod company Worker. The Harrier is another spring-powered pump action mag fed Nerf blaster, yeah I know, but it might be the spring powered pump-action mag fed foam flinger to rule them all! Seriously. You might not ever need to buy another blaster after this one. It’s not perfect, I mean nothing is (just ask my wife), but *spoiler alert* if you’re looking for your next Nerf war primary: look no further!
No products found.
What’s in the Box?!
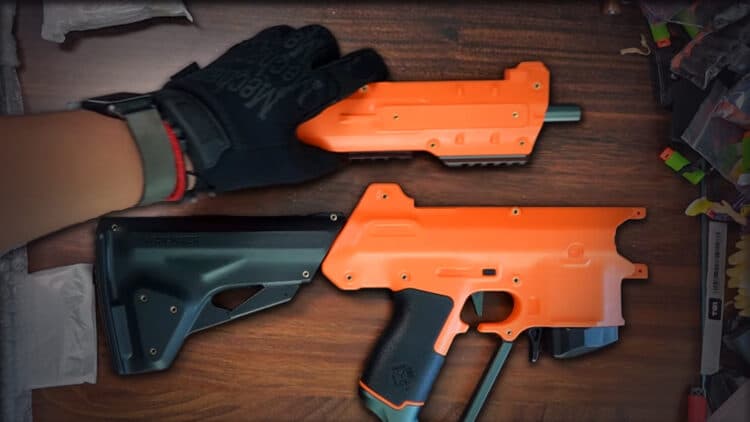
The Worker Harrier comes in a box that appears to be a lot smaller than the blaster seems to be. You know what that means! Yup, some assembly is required! So in the box, you’ll find the Harrier, in two halves, an extra spring and barrel, the top tactical rail, the two side tac rails, a bolt-action style priming handle, a vertical foregrip priming handle, a Scar barrel muzzle device, a bag of Worker Gen 3 half-length darts, and a little baggie full of screws and replacement O-rings. The Worker Harrier comes with the 6 round sniper magazine already inserted into the back half of the blaster.
Worker Harrier, Assemble!
The Harrier also comes with a nice little colored instruction manual, but if you’re reading this article you probably won’t need it. Remove the magazine and Let’s begin!
To assemble the Worker Harrier, first open the little baggie with the screws and carefully dump them out onto your work bench (or your desk or wherever). You will need to put the long barrel front half into the receiver, or back half of the blaster. There will be 2 screw holes that you need to slide the longer type screws into. This should hold it into place. Grab the included Allen key, which should be located underneath the shoulder stock at the end of the buffer tube.
The same Allen key can be used to assemble almost every other part of the blaster. Slide the top tactical rail on the top of the blaster and make sure you can see screw holes through all 4 openings in the tac rail. Add a screw in each screw port using the small screws and tighten them up. Do the same with the side tactical rails.
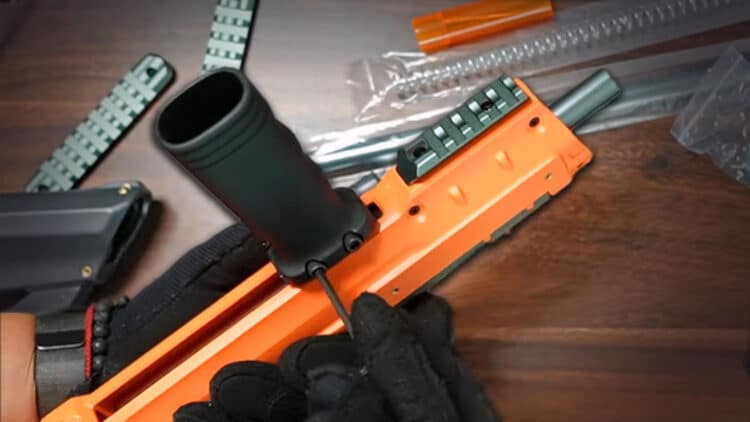
Next, you’ll need the other, bigger included Allen key. We’ll use this beefier Allen key to install the vertical pump grip (or the bolt-action style sniper priming handle) onto the small black picatinny rail underneath the blaster. Make sure it’s the small black one and not the premium metal one that’s more towards the front of the bottom of the Harrier.
Finally slide the Scar barrel muzzle device onto the end of the barrel and you’re done! Good job, you Foam Head, you did it! If you have trouble and can’t complete one of the steps, check out my video review of the blaster up above and look for a brief assembly guide in my ‘Unboxing and Assembly’ portion of the video.
External Overview
Starting at the front of the blaster, “there’s no N-Strike Barrel lug” you just find the muzzle. When you look at the muzzle of the Worker Harrier, all you really see is the end of the gray barrel sticking out. And sure, the Harrier comes with one of those orange Worker scar barrel muzzle devices, but there’s more to the Harrier’s muzzle than meets the eye.
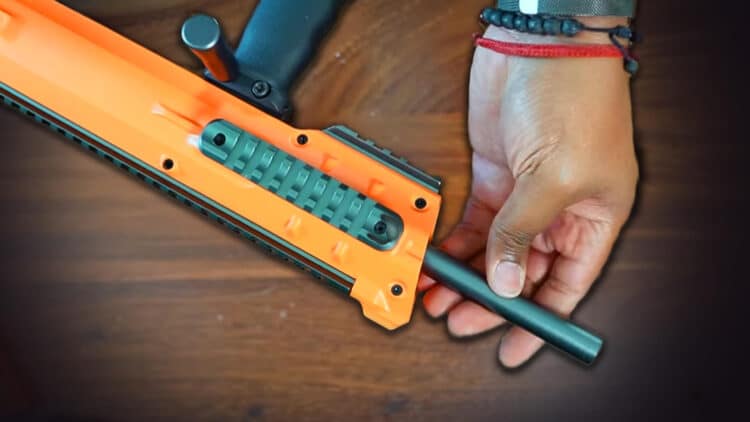
If you grab the barrel by the muzzle, you can actually just unscrew the barrel and remove it completely. The Worker Harrier features a quick change threaded barrel system where you can just unscrew your barrel and screw in a completely different one. The Harrier comes with two different barrels; one 12.2 inch and one 14 and a half inch barrel, which I installed in the blaster. In the box, it comes with the smaller 12 inch barrel installed. These will vary in power and should be used in combination with differently powered springs to find your perfect power level for your blaster.
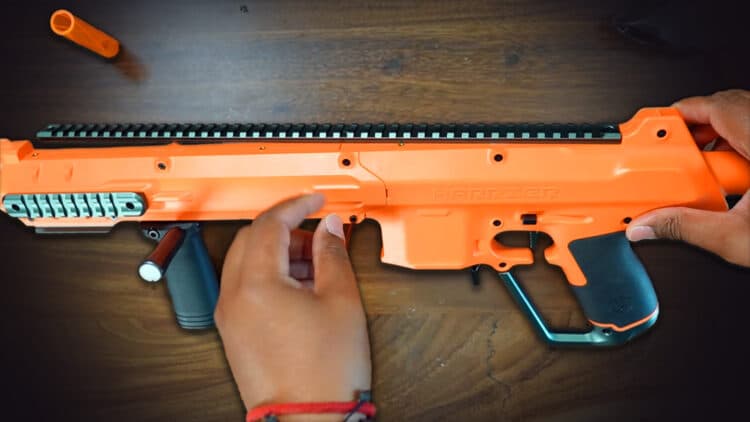
The Worker Harrier comes with these two different barrels and also two different springs so you can mix and match until you find the exact performance that you’re looking for. There are also multiple other spring and barrel options for the Harrier sold separately, so the possibilities are virtually endless. And speaking of Endless Possibilities, the Worker Harrier has a lot of picatinny rails. There’s one full length rail going all the way across the top of the blaster and two medium rails, one on either side of the blaster. Finally, there’s one little short boy rail underneath the blaster, near the front.
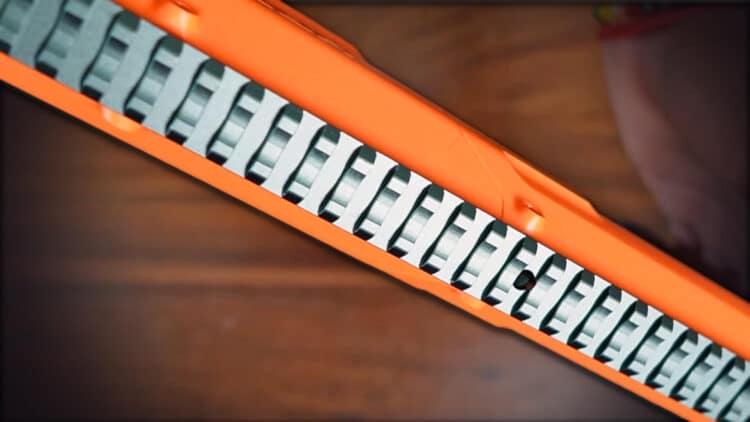
These rails are super premium and look so effing good in the metallic gray finish they come in, geez! They’re also super sturdy and clean looking and that’s why I could never, ever think of replacing them with 3D printed rails. Some people are replacing the top rail with split 3D printed rails just to make it easier to break down, but that’s honestly just completely unnecessary.
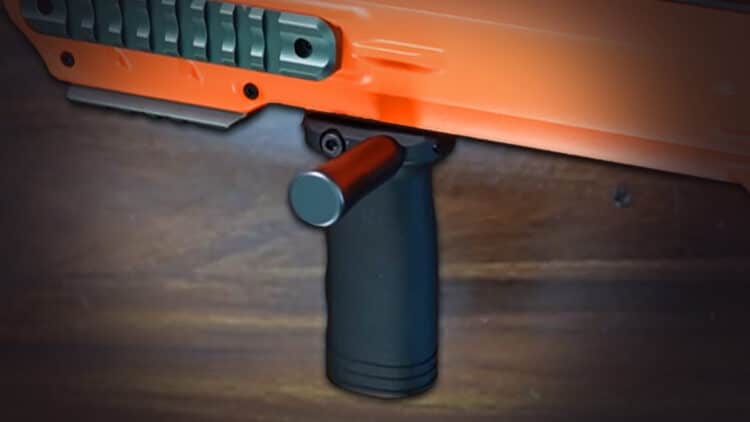
Anyway, for the priming handle of the Harrier we have a standard Worker vertical foregrip. This thing is a great size and it’s super comfortable. But, if you don’t like it, there’s a picatinny rail underneath the grip so you can swap it out and replace it with another pump grip of your choosing. I think it’s just fine though, so I won’t be replacing mine. The Harrier also comes with another priming option right out of the box. There’s this little bolt-action charging handle looking thing that can replace the vertical grip if you’re really going for that sniper aesthetic.
But I have a little trick where you can get the best of both worlds. The actual charging handle is just screwed on like any other screw, so you can actually remove it from this base plate and use that charging handle to replace one of the bolts on the Worker vertical foregrip and screw the grip in to the Harrier that way. Boom!
Either way though, the pump action here is unbelievably smooth. It’s like butter, baby! And it even has a return spring, so you don’t have to push the grip back to the forward position if you don’t want to. It’ll go there on its own, you lazy bass-turd. Lol.
Moving back again, we find ourselves at the magazine well. The mag well here is very no frills and features a slight flare to make mag insertion a breeze. Remember: the Worker Harrier only takes half length magazines and only shoots half length darts. And speaking of mags, the Harrier comes with this puny little six round mag that is supposed to fit in with the sniper aesthetic, but that’s just for looks and I don’t view the Harrier as a sniper anyway.
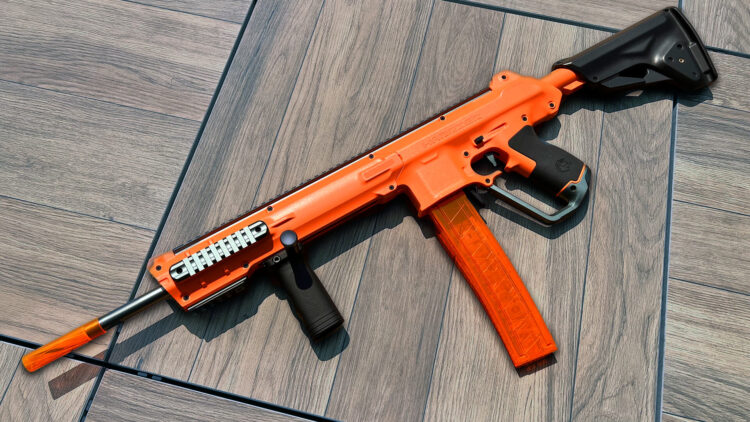
I mean you can definitely build it out to be a sniper class blaster with the longest barrel and the strongest spring. Maybe add a good scope and a bipod if you want to go all the way, but I like to run my Harrier like a rifle.
This is my Harrier, this is my gun! This is for foam flinging, this is for fun! Lol. Yeahhh, the Worker Harrier is my foam flinging rifle. So we definitely won’t be needing this puny little sniper mag. Also, the Harrier is fully compatible with Worker Talon mags, duh! So pop a 15 or 18 round Talon mag into the magazine well and you’re good to go!
The paddle style mag release here is standard and fully ambidextrous. It feels very premium and I prefer it to the older 3D printed Worker mag releases that they used to use. Moving back we find ourselves at the trigger assembly. The trigger pull here is just as smooth as the priming action! (It’s like butter, baby!) The actual trigger has a texture to it and a flat face to make sure your trigger finger doesn’t slip.
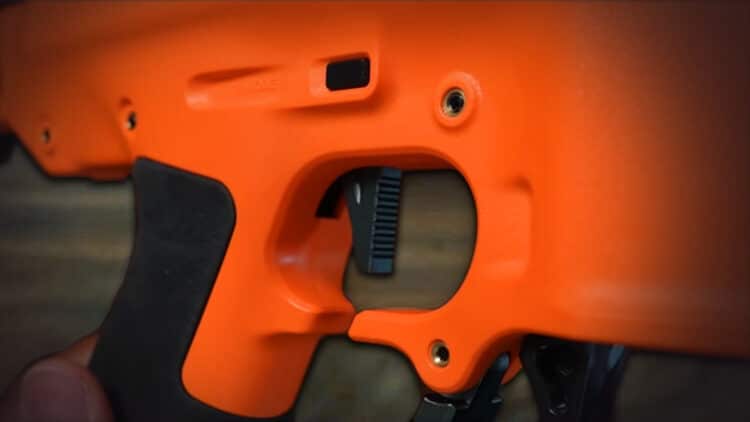
This Blaster does not have Slam-Fire, but that’s actually what I prefer on a blaster like this. The Worker Harrier can shoot just as fast as you can pump it and pull the trigger, so you’re really not losing anything unless again, you’re a lazy bass-turd. Not having Slam Fire allows you to de-prime the blaster, which is a feature I much prefer over the spammy high ROF the Slam Fire grants you.

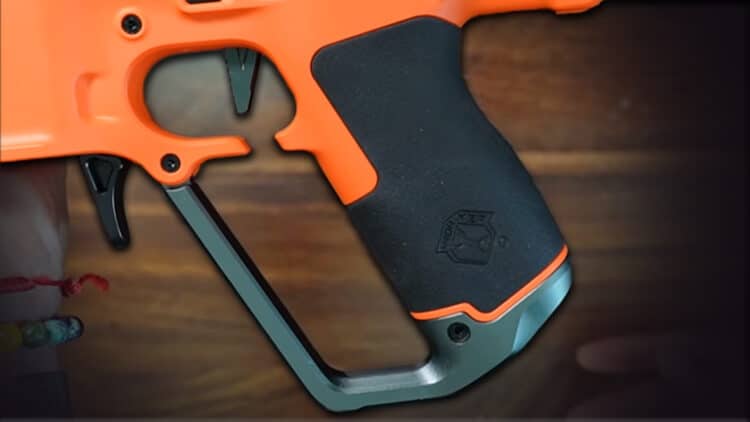
The Harrier has an amazingly comfortable pistol grip, with some kind of rubberized sleeve and a cool looking metal hand guard. Blasters with rubberized sleeves on the grip are quickly becoming my favorite, like on this, the Phoenix 2.0, and the Dart Zone Pro Mark-1.2(Amazon link), and I really notice it when they’re not there. Luckily, Worker seems to add it to every blaster they make, so we’re good there.
The handguard is another story. Me personally, I think it looks really cool with its gray metallic finish that matches the barrel and picatinny rails, but lots of people are removing it and putting a 3D printed cap on the bottom of the grip here. The handguard looks cool but it does get in the way of the mag release a little bit. If you’re trying to hit it with your firing hand, uh, that could be a problem. Some people also just think it looks better without it, but I just view replacing that sexy gray metal with black 3D printed pieces as kind of a downgrade, really, you know?
All the way back to the top, the Worker Harrier has a nice little set of ABS sights encasing the top tactical rail, but much like the sniper mag that comes with the blaster, these ABS sights are just for show. They’re so low on the blaster that it’s nigh impossible to actually use them. So you’re probably going to want to invest in a decent airsoft optic, like any of those cheap red dot sights on Amazon. They’re all pretty much the same and they’re all very decent.
Last, we have the Harrier’s adjustable buffer tube shoulder stock. The stock can adjust forward and back a few different lengths. You can also slide the stock all the way off to reveal a standard M4 buffer tube with a little hidden spot on the end to tuck away and store the Harrier’s included Allen key. This little Allen key is all you need to completely disassemble the entire blaster. Also it’s so small I would surely lose it otherwise.
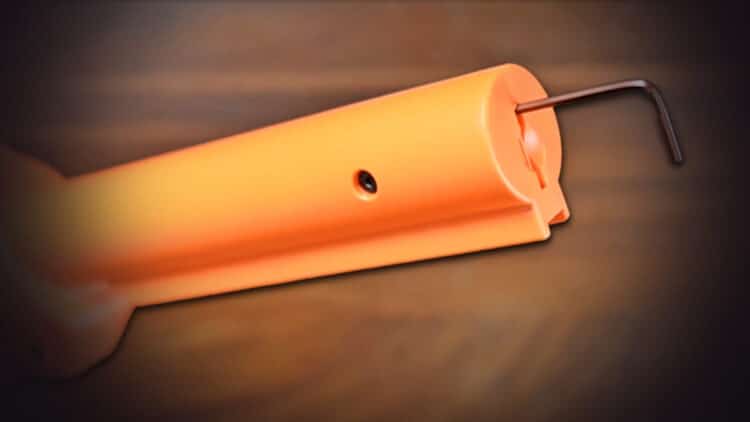
Back to the M4 buffer tube, that means you can replace the shoulder stock very easily with so many different airsoft stocks. But I don’t really see any need for that as the Worker Harrier stock is more than capable. Though I surprisingly did run into the same problem as fellow Nerf enthusiast Frank Cooper. He noticed that there’s a seam right in the middle of the shoulder stock that kept pulling his facial hairs out of his face, which is of course incredibly painful. I don’t even have a lot of facial hair, but a few of my lone facial hairs did get caught in the small seam on top of the shoulder stock here. Annoying!
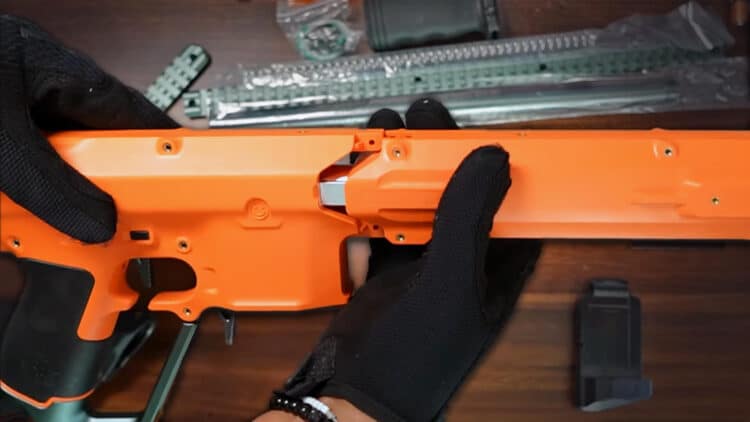
Breaking down the Worker Harrier
Like most high performance blasters these days, the Harrier can be broken down in order to easily access the main spring. To break down the Worker Harrier, we’re going to do the opposite of what I did in the assembly. First, unscrew the two picatinny rail screws closest to the muzzle, or if you’re me, just remove the screw closest to the muzzle. I actually only installed two screws, one on each end of the picatinny rail. This makes it quicker and much easier to break down the blaster and I haven’t noticed any kind of stability issues with the rail or the blaster on whole.
Next, unscrew the two screws on the side of the Harrier that are just after the mag well. Or before the mag well, depending on which direction you’re coming from. That’s it. You can just pull the Harrier apart into two halves and easily swap out springs. This process is simple but can be tedious compared to some other blasters that either use takedown pins or have accessible and tool-less spring retainers in the buffer tube.
Let’s Shoot This Thing! (Firing Test)
Right! Let’s shoot this thing and run her over the chrony! You can witness it in real time by clicking the video below, which will start you right at the firing test part of the video review.
Okay, so the footage is a little choppy, but I went outside into my courtyard to fire off some shots since I knew the Worker Harrier was a powerful blaster and it needed to be shot outside to really spread its wings. My courtyard is about 100 feet long and the darts were going off the edge of the courtyard railing and across the parking lot and into my neighbors backyard. Sorry, neighbor, if you’re reading this!
The Worker Harrier is super fun and is a blast to use. You can really feel the power in the shots and they are usually on point as far as accuracy is concerned as well. Though, I’m sure you can get a better SCAR barrel muzzle device than the one they include here. (I’ll do a separate article on SCAR barrels in the future, so be sure to bookmark my website.)
Muzzle Velocity Testing

All right, so I ran the Worker Harrier over my Ballistic Chronograph in a bunch of different configurations and these are the results. With the short barrel and the weaker spring, the Harrier shot at an average muzzle velocity of 169 feet per second. With the short barrel, weak spring, and the SCAR barrel, the muzzle velocity was largely the same at 170 feet per second. With the long barrel and the weak spring, we see a slight increase to 175 feet per second.
Now, here’s where we really get into what the Worker Harrier can do! With the longer barrel and the strong spring, the Harrier saw an average muzzle velocity of 192 feet per second. The long barrel, strong spring, and the SCAR barrel muzzle device measured at 195.3 feet per second and a standard deviation of 2.7, which is pretty great!
I never used the Worker Swift, but if it gave us this, well then thank you, Worker Swift! We’re not worthy, we’re not worthy, we’re not worthy! lol
Worker Harrier Conclusions
The Worker Harrier is such an amazing and awesome blaster. The pump-action prime is buttery smooth (it’s like butter, baby!) and I must be used to clunky primes because the fact that they offer an aftermarket part to make it even smoother just blows my mind. And something I haven’t really touched on much in this review, but it’s actually a pretty huge deal, is the build quality. The build quality on the Harrier is next level! This is the sturdiest, most well-built blaster that I’ve ever laid my hands on and that’s not just aftermarket stuff, either, that’s including official Nerf blasters. This thing is just built Ford tough! It’s definitely built different.
The ergonomics are also very on point here and the Harrier is super comfortable, from the textured pistol grip to the vertical foregrip, I really have no complaints here! If I had to force some though, the Worker Harrier should definitely have come with quick takedown pins or at least tool-less thumb screws to break the blaster down quickly. Also, that stupid seam on the stock is annoying when aiming in. It didn’t happen every time, but it pinched me and I didn’t like that, not… one… bit.

Other than that, there’s not too much to complain about here. This is so close to being the perfect blaster. If you don’t have one, you should go and buy one, like, now. Right now. Seriously, purchase links are down below. Also, every picture in this article is a purchase link if you click on it. The Worker Harrier is the best injection molded spring powered blaster ever made, period, no comma. Yeah, I said it!
No products found.
And that is where the review ends. If you made it this, far let me know your thoughts on the Worker Harrier down below. Have you picked one up yet? And if you haven’t, what are you waiting for? This thing is awesome! Just do it! As always, I hope you enjoyed the article and if you did, make sure to leave a comment and bookmark this website (add it to your Favorites) — it’ll help out tremendously and trust me: I very much still need the help!
I’ve been away from this website and my YouTube channel for so long that everyone forgot that I ever existed. So if you’d like to help, just visit regularly and read a few articles. Visit my other website, which was my original website ‘Nerf Gun Attachments.’ I switched the Nerf blog over here to Bleenga.com and I turned Nerf Gun Attachments into the “Nerfer’s eMall” so go and check it out!
With that said, my name’s Blee, you’ve just been tagged out, I love you Foam Heads and I’ll see you… in the next one!


Last update on 2025-04-12 / Affiliate links / Images from Amazon Product Advertising API


Foam Head Opinions